Caller ID Pop-up
If you use your own CRM, it can be integrated with the While1 Voice application to allow automatic display of Caller ID Pop-up, when the call is answered.
For each call in a queue or for calls coming on an Inbound route, User type and which is answered by phone, a pop-up up (Screen pop) containing caller ID will be displayed to the agent that answered the call in a new browser tab (Chrome).
Steps to follow to dispaly the Caller ID Pop-up:
Step 1 - Finish integrating your CRM with PBX server
Available integration methods:
- Caller Data Retrieval from DB
- Caller Data Retrieval via Webservice
- another method specific to your business
The integration of the PBX with the external CRM allows the identification of the customer in your database by phone number and the displaying of the Caller ID Pop-up to your agent.
The integration method best suitable for you should be discussed with the While1 Voice representative, and depending on this, you can use the resources provided in the links above.
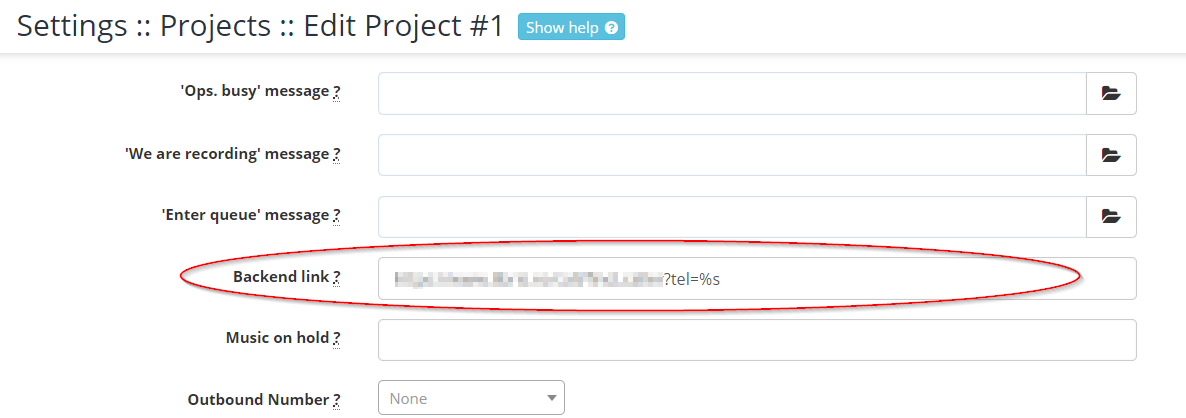
Step 2 - Provide the url to field Backend link
- Fill in the Backend link field, according to the indications in the Projects section, to allow the Caller ID Pop-up to be opened when an incoming call is answered, identifying the customer by their phone number.
The URL will be provided for each project separately, for which there is a completed integration, if there are more projects / stores added.
The URL entered must be the one used for the usual search for a customer's phone number in your CRM, replacing in the syntax the phone number with the% s parameter as it follows:
E.g. the url syntax: https://crm.com/contacts/search%s ; %s will be replaced with CallerName in order to display the Caller ID pop-up to the agent that answered the call.
Fill in the external CRM Url only if you have agreed on this type of interaction between your own CRM and PBX server with our representative.
Please note!
- The Backend link that is directly integrated in the form is used only when another Url is not provided via API.
- The Backend link received via API overrides that project!
Step 3 - Choosing the right extension
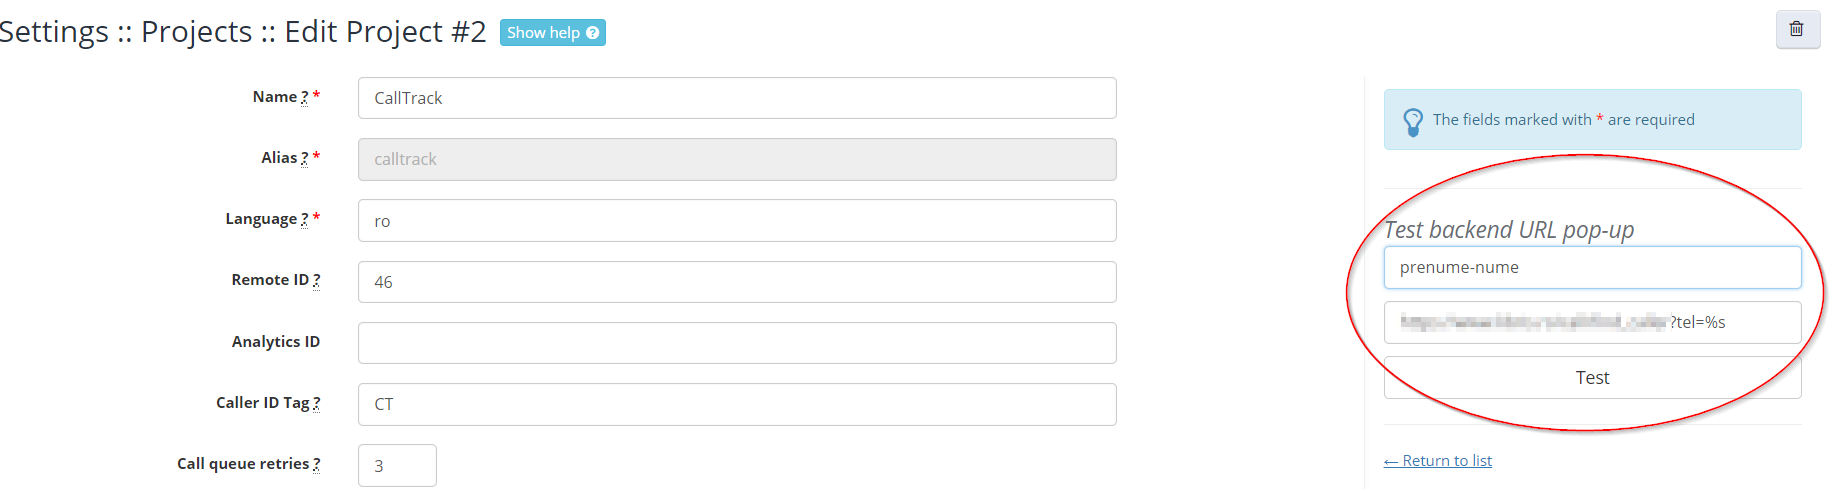
Step 4 - Tests the URL to Backend
- Go back to the project page where you entered the url: Settings / Projects / Edit Project: Settings / Projects / Edit Project
- Fill in the test form:
Please note!
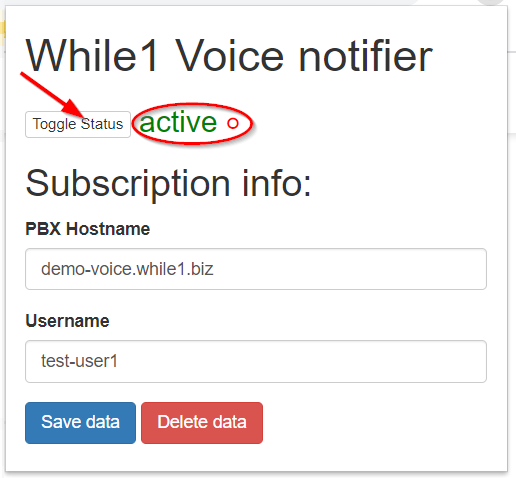
- Make sure that the status Toggle is active after you have saved the information; by default status is paused, click on Toggle to change the current status
- In order for the extension to work, port 8080 from client's firewall has to be unblocked, and the IP from which you connect needs to be whitelisted.
Depending on the IP type, you need to follow the below steps:- if the IP is static, it needs to be previously provided to a While1 Voice representative in order for the IP to be added in firewall and access allowed.
- if the IP is dynamic, follow the IPs confirmation and approval steps in section Confirm IP address
- Optionally, you can activate the option to open a pop-up when the call was finished (eg for call encoding), if it was answered in a queue, by activating the USE_HANGUP_EVENT_PUSHER option. In this case, the parameter ctk_action = queue_answer_end will be automatically added to the URL
Available in other languages: RO
Go to top